A surprising fact is that the standard pixel dimensions for a CD cover are 1425 x 1425 pixels. This is key for a professional-looking cd case design. To make a stunning, professional-quality album cover, knowing the right pixel dimensions is essential. The correct cd case dimensions pixels can greatly improve your album cover’s look.
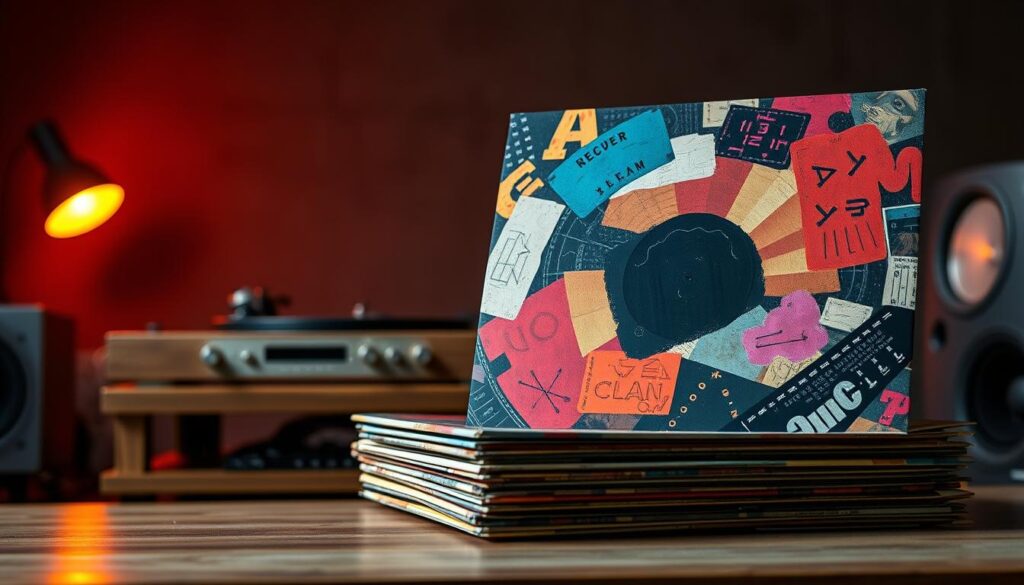
Introduction to CD Case Design
When designing a cd case, it’s important to think about pixel dimensions and resolution for high-quality prints. The standard resolution for print quality is 300 DPI. Using low resolution can lead to a pixelated image. Knowing the right cd case dimensions pixels and design principles can help you create a professional-looking album cover. This can attract new fans.
Key Takeaways
- Standard pixel dimensions for a CD cover are 1425 x 1425 pixels
- Correct cd case dimensions pixels are key for a professional design
- Industry-standard resolution for print quality is 300 DPI
- Using low resolution can result in a pixelated image
- Understanding cd cover design principles can help you create a professional-looking album cover
- High-resolution, square-shaped covers are now the standard for streaming platforms
- Typical physical album cover dimensions have evolved from inches to pixel dimensions due to the rise of digital music
Understanding CD Case Design Basics
Creating a professional cd cover starts with knowing the basics. A good cd cover can really make your album stand out. It should look great and share the artist’s message well. You need to think about the right size and the differences between digital and physical designs.
A professional cd cover has key parts like the artist’s name and album title. The design should be simple yet show the artist’s style. Using color and imagery can make the cover really grab attention. This way, designers can make a cover that looks professional and eye-catching.
When designing a cd case, remember the cover size is usually 3000 x 3000 pixels, with a 1:1 ratio. The final artwork should be at least 72 dpi, but 300 dpi is better for quality. By following these rules and knowing the basics, artists and designers can make a cd cover that showcases their music well.
Standard CD Case Dimensions in Pixels
When designing a CD case, knowing the standard pixel dimensions is key. The standard size for a CD cover is 1425 x 1425 pixels. This is the same as 4.75 inches x 4.75 inches at 300 DPI. This high resolution ensures your design is clear and vibrant, meeting industry standards.
The cd case dimensions pixels are important for your design’s look. Using the correct standard pixel dimensions makes your design look professional. Remember, Jewel Case sizes are 4.75 inches (width) x 4.75 inches (height). These sizes guide the standard pixel dimensions.
- Using high-quality images with a resolution of at least 300 DPI
- Ensuring the design is properly scaled to the standard pixel dimensions
- Leaving sufficient bleed area to avoid any cutting errors
By following these guidelines and using the standardcd case dimensions pixels, you can make a professional CD case design. This design will meet all industry standards.
The Anatomy of a CD Case Layout
When designing a cd case layout, it’s key to think about each part. The front cover, back cover, and spine all matter for a professional look. A good cd case layout can really improve how your product looks.
The cd case layout has a front, back, and spine. The front shows the album title, artist name, and graphics. The back lists tracks, includes lyrics, and more. The spine’s size is important for fitting on shelves and being seen.
Here are some key things to think about for a cd case layout:
- Front cover specifications: title, artist name, graphics, and images
- Back cover requirements: track listings, lyrics, and other relevant information
- Spine design measurements: ensuring proper fit on store shelves and easy identification
A well-designed cd case layout can make your product more attractive. By focusing on the front, back, and spine, designers can create a professional cd case. This meets the needs of the artist and the record label.
By following these tips and considering each part of a cd case layout, designers can make high-quality designs. Whether it’s for a new album or a re-release, a good cd case layout is key. It helps make a strong first impression.
| Component | Specifications |
|---|---|
| Front Cover | Title, artist name, graphics, and images |
| Back Cover | Track listings, lyrics, and other relevant information |
| Spine | Design measurements for proper fit on store shelves |
Resolution Requirements for Print-Ready Artwork
Creating print-ready artwork for your CD case requires knowing the resolution needs. The best resolution is 300 DPI (dots per inch) or higher for top quality. This is much higher than web images, which are usually 72 or 96 DPI.
To make sure your artwork is ready, check its file properties for resolution. Also, use CMYK color mode to prevent color changes during printing. CMYK values for rich black are: C=75, M=68, Y=67, K=90.
Here are some key points to consider when preparing your print-ready artwork:
- Use a resolution of at least 300 DPI for optimal quality
- Check the file properties for horizontal and vertical resolution
- Use the correct color mode, such as CMYK
- Avoid color shifts during printing by using the correct color profile
By following these guidelines, you can ensure your print-ready artwork meets the resolution requirements and is of high quality. Always check the file properties and use the correct color mode to avoid any issues during printing.
Color Profiles and Image Specifications
Creating CD artwork requires knowing about color profiles and image specs. The choice between rgb vs cmyk color modes is key. RGB is best for screens, while CMYK works better for prints. The right color profile avoids color mistakes.
Image specs like resolution and file type are also important. Aim for a 1400 x 1400 pixel resolution and a 10MB file size limit. JPEG or PNG files are usually okay. The right specs help avoid delays or rejections.
Choose the best file formats like JPEG or PNG for quality. The artwork should be in a 1:1 aspect ratio, or square. By following these tips, you can make top-notch CD artwork.
Essential Software Tools for CD Case Design
Creating a professional-looking cd case design requires the right software tools. With many options, picking the best can be tough. Adobe Photoshop and Canva are two popular choices. They offer features to help you make stunning designs.
Adobe Photoshop is a top choice in the design world. It has advanced tools like layers and masks for detailed designs. Canva is great for beginners. It has many templates and design elements for quick, professional designs.
Look for image editing capabilities, template options, and export settings in software tools. The right tool can make your cd case design stand out. Whether you’re experienced or new, there’s a tool for you.

Other tools like GIMP, Sketch, and Inkscape are also available. Think about your skill level, design needs, and budget when choosing. The right tool will help you create a professional cd case design.
Common Mistakes in CD Case Dimensions
When designing a CD case, it’s key to avoid common mistakes. These can affect the quality of your final product. One major thing to watch is the cd case dimensions. Wrong measurements can cause a bad fit or cut off parts of your design.
It’s also important to avoid resolution errors. A low-resolution image can look blurry or pixelated when printed. To get high-quality prints, use at least 300 pixels per inch (dpi). Also, don’t forget to follow the template guidelines and double-check your measurements to avoid mistakes.
Some other mistakes to avoid include:
- Ignoring the safe zone for text placement, which can result in text being cut off during printing
- Using low-resolution images or incorrect file formats, which can affect the overall quality of the design
- Not accounting for the bleed area, which can lead to important design elements being cut off during printing
To make sure your CD case design looks professional, be aware of these mistakes. Always double-check your measurements and follow the template guidelines. This way, you can avoid resolution errors and other common mistakes.
Template Resources and Guidelines
Designing a CD case can be easier with the right tools. There are many online options, but picking the best can be tough. We’ve gathered key resources and guidelines to help your CD case look great.
Popular resources include pre-made CD case templates. These can be tailored to your needs. They come with guides on resolution, color, and image size. This ensures your design meets iTunes and Amazon standards.
There are also online guides for CD case design. They offer tips on fonts, colors, and images. By following these, your CD case will be eye-catching and effective in promoting your music. Important design tips include:
- Using high-resolution images and graphics
- Choosing a color scheme that reflects your brand and music style
- Selecting a font that is easy to read and consistent throughout the design
- Leaving enough space for important information, such as your album title and artist name
By using these resources and guidelines, you can make a professional CD case design. Always choose high-quality resources to meet the highest standards.
Designing for Different CD Case Types
Creating a professional CD case means knowing the different types. Each case has its own specs, and understanding these can greatly impact your design. For example, jewel cases have a standard size and material. Digipaks, on the other hand, offer more flexibility in panel setup.
Designers should also think about the environmental impact of their choices. Digipacks are better for the planet because they use less plastic. They are also lighter than jewel cases, making them more eco-friendly. It’s important to consider these factors to make a product that looks good and matches your audience’s values.
Some popular cd case types include:
- Jewel cases with inserts ranging from 1 side to up to 36 pages
- Digipacks configured with 4, 6, 8, or 10 panels
- Slim cases with a more compact design
By knowing the unique features of each cd case type, designers can make their products stand out. Whether you’re working with jewel case specs or digipak dimensions, focus on balancing looks with function and greenness. With the right strategy, you can make a CD case that meets your clients’ needs and connects with your audience.

Best Practices for Image Placement
When placing images, there are key practices to follow. Proper image placement greatly affects your CD case design’s look and feel. It’s important to consider bleeds and safe zones. Bleeds are the parts of the image that go beyond the trim line. Safe zones are where you should keep important parts away from the trim line.
For the best image placement, think about your image’s size and resolution. A pixel width of 2500 pixels is good for full-screen images on most browsers. Also, keep your file size under 2 megabytes for fast website loading.
Here are some general guidelines for image placement:
- Use high-quality images with a resolution of at least 300 PPI for print quality.
- Keep important elements within the safe zones to avoid them being cut off during trimming.
- Use bleeds to create a seamless transition between the image and the trim line.
By following these best practices, you can make a CD case design that looks great. It will show off your music and brand well.
Typography and Text Placement Guidelines
Creating a professional CD case involves typography and text placement. The right font size and style are key. They greatly affect the design’s look. It’s important to follow some basic guidelines for the best results.
Font size depends on the design. But, text should be at least 5pt. For light or white fonts on dark backgrounds, 7pt is recommended.
Here are some key considerations for typography and text placement:
- Choose a font that is easy to read and suitable for the design.
- Ensure the font size is adequate for the text to be legible.
- Pay attention to text placement, leaving sufficient space between lines and around the edges of the design.
Also, remember the text safe areas to avoid any critical information being cut off during the printing process.
By following these guidelines and considering your design’s specific needs, you can make a professional CD case. Keep your design balanced and clear. And always proofread your text before printing.
Working with Bleeds and Safe Zones
When designing a CD case, it’s key to grasp the role of bleeds and safe zones. A bleed is an extra area around the design, about 0.125″ on all sides. It makes sure colors or images touch the edge of the page without white margins. Safe zones, about 0.25″ in from the edge, are where important parts should stay to avoid being cut off.
To work well with bleeds and safe zones, designers should follow these tips:
- Include a 0.125″ bleed area on all four sides of the design
- Keep important elements within the 0.25″ safe zone buffer
- Submit files with the correct dimensions, taking into account the bleed area
For instance, a 4″x6″ postcard should be sent as 4.25″x6.25″ to include the bleed. By sticking to these guidelines, designers can make sure their CD case designs print well and look great.

Understanding bleeds and safe zones helps designers avoid mistakes. It ensures their designs print with top quality. Remember, the secret to great CD case design is in the details and knowing the design process well.
Quality Control Checklist
Checking the quality of your CD case design is key before printing. A detailed quality control checklist helps avoid mistakes. It ensures your design looks professional and meets standards.
Quality control is vital in CD case design. It prevents errors that could cost a lot or cause delays. By adding quality control, pre-print checks, and digital format checks, your design will be perfect for printing.
Some important steps in the quality control checklist are:
- Verifying the resolution and dimensions of your design to ensure they meet the required standards
- Checking the color profile and image specifications to ensure they are compatible with the printing process
- Validating the digital format of your design to ensure it can be printed correctly
By using this checklist, you can make sure your CD case design is top-notch. This avoids mistakes and ensures a professional finish. Quality control, pre-print checks, and digital format checks are key in CD case design.
Quality control is a continuous process that needs focus and a dedication to excellence. By focusing on quality control, pre-print checks, and digital format checks, you can make your CD case design the best it can be.
| Quality Control Step | Description |
|---|---|
| Pre-print verification | Verifying the resolution and dimensions of your design |
| Digital format validation | Validating the digital format of your design |
| Color profile check | Checking the color profile and image specifications |
Export Settings for Different Purposes
When you export your design, export settings are key. They make sure your file is ready for its purpose. Whether it’s for print or digital, the right settings matter a lot. For different purposes, like printing or social media, you need to tweak your settings.
For print, use a high-resolution setting, like 300 pixels per inch (PPI). But for digital formats, like Facebook or Instagram, a lower resolution, like 72 PPI, is fine. Here are some basic guidelines for export settings:
- Print: 300 PPI, CMYK color mode
- Digital: 72 PPI, RGB color mode
- Facebook: 851px x 315px, 72 PPI, RGB color mode
- Instagram: 1080px x 1080px, 72 PPI, RGB color mode
Adjusting your export settings for different purposes ensures your design looks great. Whether it’s printed or shared online. Always check the specific needs for each platform or format to optimize your file.
Troubleshooting Common Technical Issues
When designing a CD case, you might run into problems like resolution issues, color space conflicts, and size mismatches. It’s key to know the common problems and have the right tools and methods to fix them.
Designers often face issues like low-resolution images, wrong color modes, and incorrect sizes. To prevent these, make sure your images are high-resolution, your color mode is CMYK, and your sizes are correct.
Resolution Problems
Album art in iTunes should be 600 x 600 pixels. But, scanned images at 600 dpi can be too big for computer screens. To solve resolution problems, scan images at 150 dpi. This makes them slightly larger than 600 x 600 pixels.

Color Space Conflicts
Color space conflicts happen when your image’s color mode isn’t CMYK. To avoid these, make sure your color mode is CMYK, mainly when printing your CD case.
To fix common technical issues, follow these steps:
- Check your image resolution and adjust it if necessary
- Ensure your color mode is set to CMYK
- Verify your dimensions are accurate
Professional Tips for Stunning Results
To get stunning results in your CD case design, follow some key tips. High-quality images are a must. Use a design with at least 300 DPI and make sure images are print-ready.
Effective typography is also critical. The right font, size, and color can highlight your design’s best parts. Attention to detail is essential for a top-notch design.
Here are more tips for stunning results:
- Use a consistent color scheme and typography throughout your design
- Ensure that your design is well-balanced and easy to read
- Use bleed and safe zones to avoid any cutting errors during the printing process
- Choose the right file format, such as PDF, TIFF, or JPEG, to ensure that your design is printed correctly
By following these tips, you can make a CD case design that looks great and promotes your music well. Always use high-quality images, effective typography, and pay attention to detail for stunning results.
Conclusion: Creating Your Perfect CD Case Design
As we wrap up this guide, the secret to a great CD case design is knowing the basics. You need to understand the standard sizes and the importance of clear images. Paying close attention to every detail is key.
Designing for any type of case, like jewel or slim, requires careful planning. Make sure your design fits perfectly and looks good. Use the tools and templates we’ve shared to make your design process smoother.
Your CD case design is the first thing people see of your music. A well-made design can make a big difference. It shows off your music in a beautiful way. So, let your imagination run wild and use Nico’s expertise to make your perfect CD case design a reality.